
How to Remove Background in Canva (Fast & Easy Guide for 2026)
Many people think that learning how to remove background in Canva is super simple. But when they actually try it, they upload a photo, click around the screen, and still get a messy cutout. They just want a clean product photo without any distractions, a logo without an annoying white box, or a person cut out nicely for a YouTube thumbnail. Instead, they get rough edges and low-quality files. This happens to beginners, freelancers, and online sellers every single day!
But here is the truth: clean pictures always get more attention. When you erase the background, your products look premium, your subjects stand out faster, and your designs feel professional instantly. That is why this guide shows you the fastest ways to remove backgrounds in Canva, fix easy mistakes, and save your work the perfect way.
Quick Answer
To remove background in Canva, select your image, click Edit Image, choose Background Remover, let Canva process the cutout, then refine if needed and download the file. For the best reusable result, export as PNG with transparency enabled.
If you want to get more out of Canva image editing, these related guides can help you create cleaner designs, transparent graphics, and better visuals:
- How to Make Background Transparent in Canva (Fast & Easy Guide for 2026)
- How to Flip an Image in Canva (Fast & Easy Guide for 2026)
- Canva Pinterest Post (2026): How to Create Pins That Get Clicks, Saves, and Traffic
- Canva Free vs Pro: What You Actually Get and Which One Fits You
Best Ways to Remove Background in Canva
| Method | Best For | Difficulty | Why It Works |
| One-Click Background Remover | Quick Results | Easy | Fastest method |
| Product Photo Cleanup | Ecommerce | Easy | Clean listings |
| Portrait Cutout | People Photos | Easy | Great for thumbnails |
| Transparent PNG Export | Reusable Graphics | Easy | Flexible final file |
| Mobile Background Removal | Phone Users | Easy | Fast editing anywhere |
How to Remove Background in Canva on Desktop
This is the easiest method for most users.
Step 1: Open Your Design
Create a new design or open an existing project.
Step 2: Upload Your Image
Use your own photo or choose one already inside Canva.
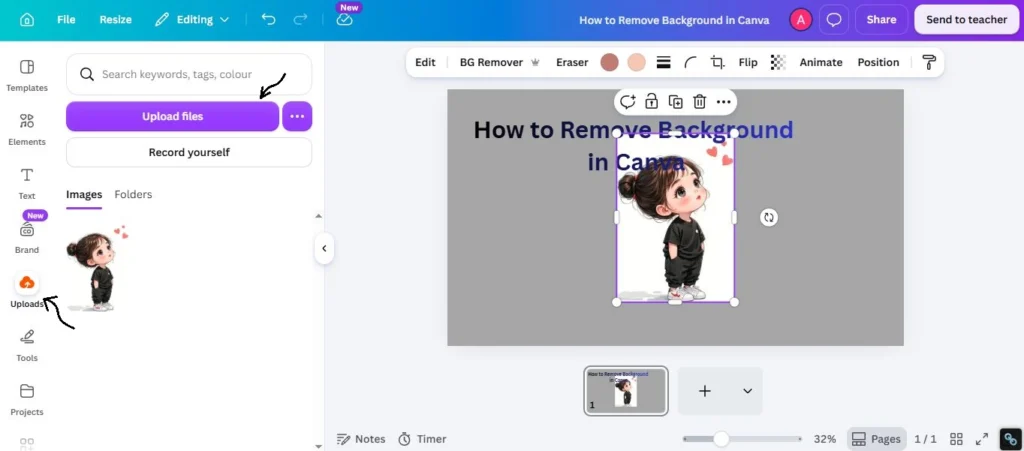
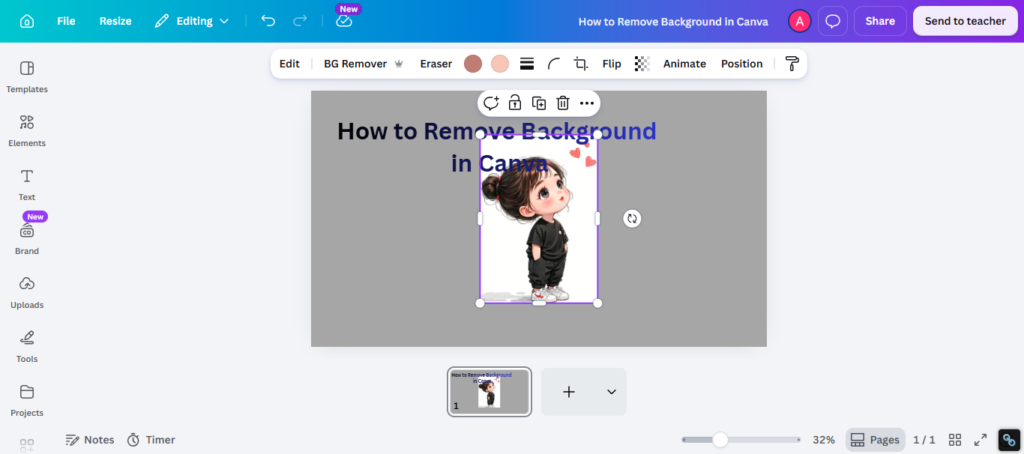
Step 3: Select the Image
Click directly on the image.
Step 4: Open Edit Image
At the top toolbar, click Edit Image.
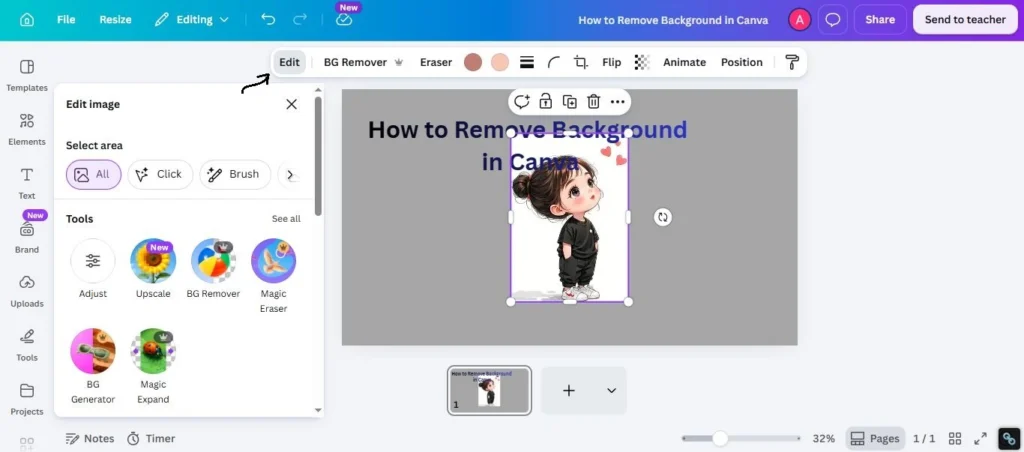
Step 5: Choose Background Remover
Select Background Remover and wait a few seconds.
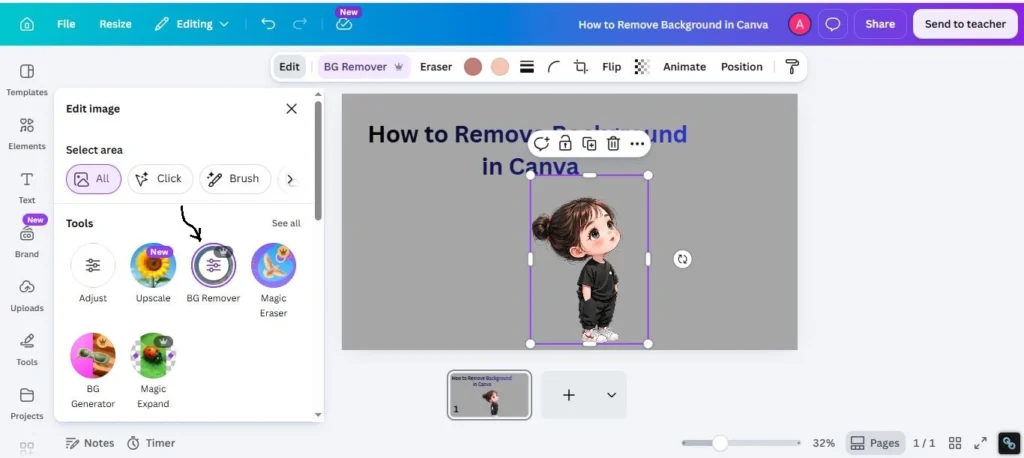
Step 6: Review the Result
Check if edges look clean.
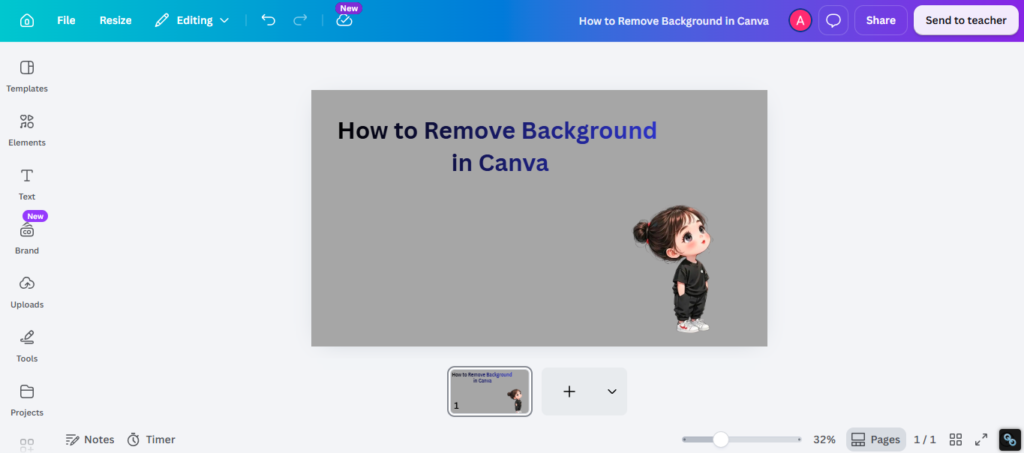
Step 7: Download the Final File
Export as PNG for best flexibility.
How to Remove Background for Product Photos
This is one of the most valuable use cases.
Best For:
- Shopify stores
- Amazon listings
- Product ads
- Social promotions
- Catalog graphics
Smart Workflow:
- Use bright clear source image
- Remove background
- Clean edges
- Add subtle shadow
- Export PNG
Clean product photos usually look more trustworthy.
How to Remove Background from People Photos
Great for thumbnails, posters, and personal branding.
Best Uses:
- YouTube thumbnails
- Speaker banners
- Social media posts
- Event flyers
- Team graphics
Tip:
Use high-contrast photos where the person stands clearly apart from the background.
Best Export Settings After Background Removal
Removing background is only half the job. Export matters too.
Best Option: PNG
Use PNG for:
- Transparency
- Logos
- Product images
- Stickers
- Overlays
JPG Is Better For:
- Standard photos
- Smaller file sizes
- No transparency needed
If you need reusable cutouts, PNG is usually the smarter choice.
Canva Free vs Paid Background Removal
Feature availability can depend on your account plan and Canva updates.
Usually Better for Advanced Work:
- Faster workflow
- More pro tools
- Brand asset workflows
- Better editing options
Always check current Canva features inside your account.
Common Problems and Fixes
Edges Look Rough
Try:
- Use higher quality image
- Start with sharper source photo
- Resize carefully
Hair Looks Messy
Try:
- Use clearer photo
- Better lighting
- Manual cleanup if available
Tool Missing
Try:
- Update Canva
- Refresh browser
- Check your plan
White Background Still Appears
Try:
- Export as PNG
- Enable transparency
- Recheck file settings
Product Looks Fake
Try:
- Add soft shadow
- Keep natural proportions
- Use clean background placement later
How to Get Better Background Removal Results
Use these practical tips:
1. Start with Good Photos
Blurry images create weaker cutouts.
2. Use Contrast
Subjects separated from background cut better.
3. Keep Edges Natural
Do not over-edit.
4. Export Correctly
PNG is usually safest.
5. Test on Different Backgrounds
Check dark and light surfaces.
Frequently Asked Questions
Select image, open Edit Image, choose Background Remover, then download the result.
Feature availability depends on your current account plan and Canva tools.
PNG is usually best, especially if you need transparency.
You may have exported the wrong format or missed the transparency setting.
Yes, it can be very useful for quick ecommerce graphics and product visuals.
Final Thoughts
Honestly, knowing how to remove background in Canva is like having a design superpower. It does not matter if you are creating cool YouTube thumbnails, clean logos, or product photos for an online store—getting rid of the messy background instantly upgrades your work. The biggest secret is simply keeping things basic. Start with a sharp, bright photo, remove distractions, save it properly, and check how it looks on different colors. While design trends will come and go, having neat and clean images is something that will never go out of style.

I’m Faraz, the founder and lead content strategist at The Vistly. With a background in digital marketing, I lead content and design strategy for the site, working alongside a small team of designers to create practical Canva tutorials, font pairings, and design resources for creators, small businesses, and marketers around the world. My goal with The Vistly is to make professional-quality design accessible to anyone, no design degree required.