
How to Insert a Table in Canva (Fast & Easy Guide for 2026)
Have you ever finished a great presentation layout and then got totally stuck trying to figure out how to insert a table in Canva? It is super annoying when you want to show a clean price list or a simple timetable, but you cannot find the menu to add rows and columns. Without a proper grid, trying to align your numbers manually creates a giant, crooked mess that makes your whole project feel a bit weak.
The good news is that learning how to insert a table in Canva is an easy secret for better graphics. It gives your client reports, restaurant menus, and product charts a sleek, organized look instantly. It is a fantastic trick for school projects, business ads, or any creative work you are sharing. In this guide, you will learn the shortcut to building neat tables and how to get perfect results every time.
Quick Answer
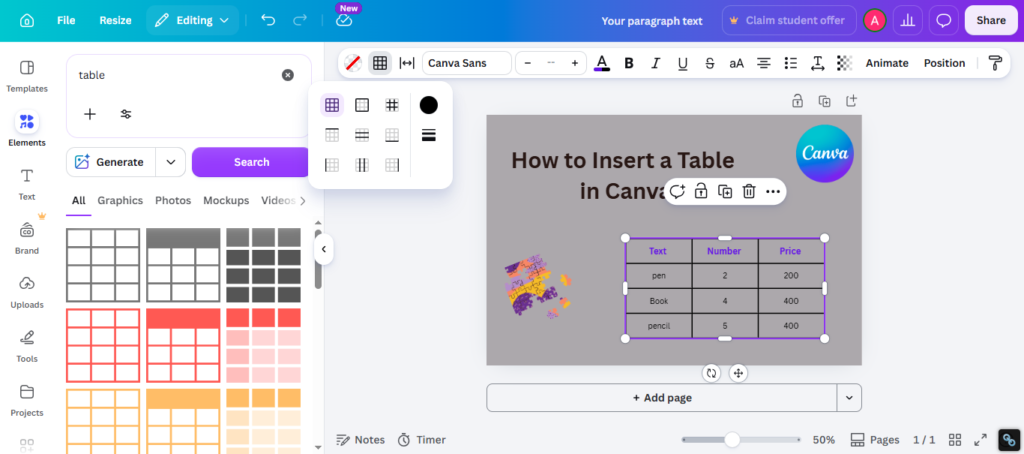
To insert a table in Canva, open your design, go to Elements or the table section, add a table, choose the number of rows and columns, then customize colors, borders, text, and spacing. This is the fastest way to create pricing charts, schedules, comparison tables, and professional data layouts.
If you want to improve the overall look of your Canva tables and layouts, these related guides can help you work with fonts, page layouts, and other Canva design features:
- Best Canva Font Pairings (Free Combinations That Actually Work)
- How to Change Page Orientation in Canva (Fast & Easy Guide for 2026)
- How to Create Instagram Carousel in Canva (2026): Beginner Guide to Posts That Get Swipes, Saves, and Shares
Best Ways to Insert a Table in Canva
| Method | Best For | Difficulty | Why It Works |
| Built-in Table Tool | Fast Data Layouts | Easy | Fastest method |
| Styled Table | Presentations | Easy | Better visuals |
| Pricing Table | Business Offers | Easy | Clear comparison |
| Manual Grid Method | Custom Layouts | Medium | Full control |
| Mobile Table Method | Phone Users | Easy | Quick edits |
What Tables Are Used for in Canva
Tables help organize information into rows and columns.
Best Uses:
- Pricing tables
- Product comparisons
- Schedules
- Timetables
- Menus
- Reports
- Invoices
- Feature lists
When data is structured well, users understand it faster.
How to Insert a Table in Canva on Desktop
This is the easiest method for most users.
Step 1: Open Your Design
Create a new project or open an existing design.
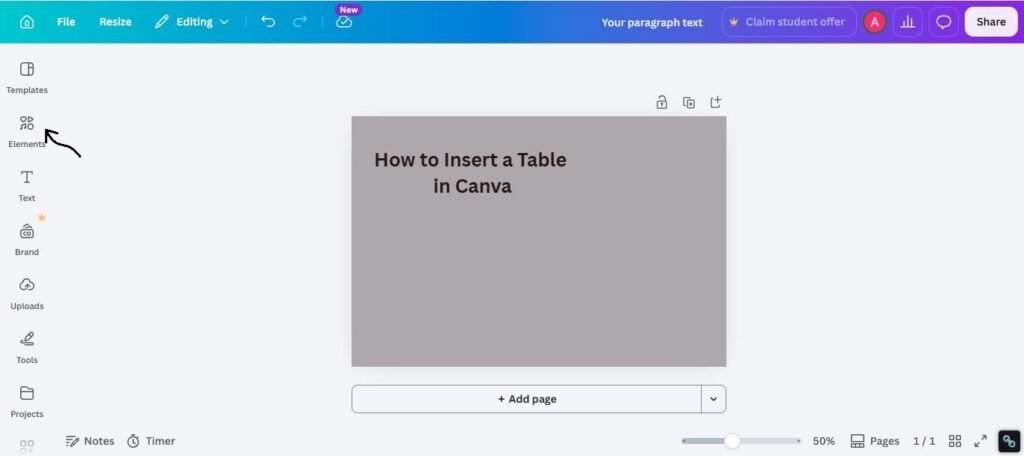
Step 2: Go to Elements
Use the left-side menu.
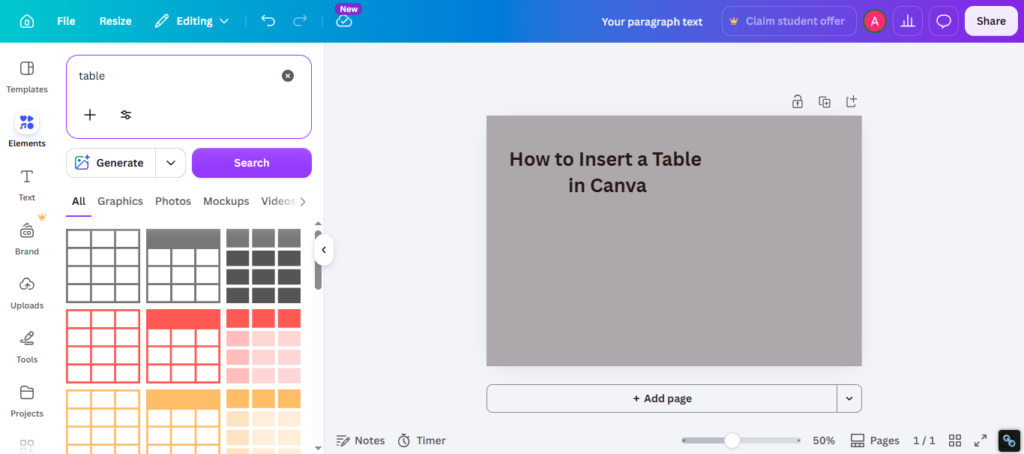
Step 3: Search for Table
Type table in the search bar or open the table section.
Step 4: Add the Table
Click a table layout to place it in your design.
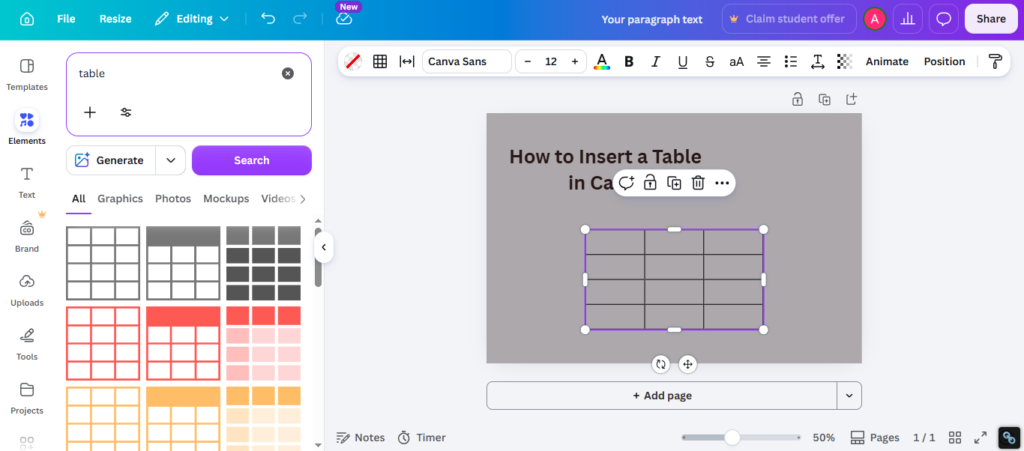
Step 5: Choose Rows and Columns
Adjust the number of rows and columns if needed.
Step 6: Add Your Content
Type text, numbers, or prices.
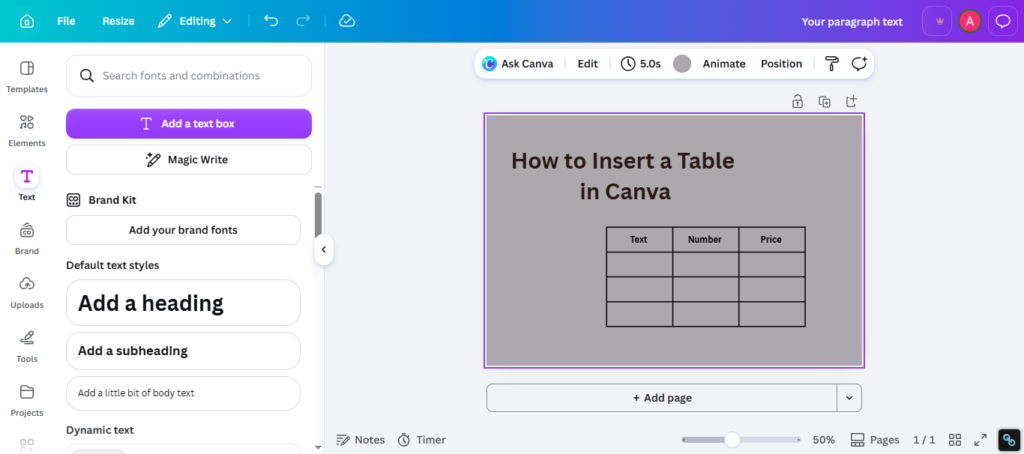
Step 7: Style the Table
Change colors, borders, fonts, and spacing.
How to Add Rows and Columns in Canva
Most users need to expand the table later.
Best For:
- Longer price lists
- Bigger schedules
- Product comparisons
- Team reports
Quick Method:
- Select table
- Use table controls
- Add row
- Add column
- Resize cells if needed
Keep the layout balanced after changes
How to Create a Pricing Table in Canva
This is one of the most valuable business uses.
Best For:
- Agency packages
- SaaS plans
- Coaching offers
- Ecommerce bundles
- Service comparisons
Smart Layout:
- Plan name
- Price
- Features
- CTA
Tip:
Highlight the most popular package using a different color.
How to Style a Table in Canva
A table should look clean, not heavy.
Best Styling Tips:
1. Use Clear Fonts
Choose readable fonts, not decorative ones.
2. Keep Good Spacing
Do not crowd the cells.
3. Use Light Borders
Heavy borders can feel outdated.
4. Limit Colors
Use 1 to 2 brand colors.
5. Highlight Important Data
Use bold text or subtle shading.
Manual Table Method in Canva
If you need more control, build a table manually.
Use:
- Shapes
- Lines
- Text boxes
- Grids
Best for unique custom designs where standard tables feel limited.
Common Problems and Fixes
Table Tool Missing
Try:
- Update Canva
- Refresh browser
- Search again in Elements
Text Does Not Fit
Try:
- Reduce font size
- Increase cell width
- Use shorter wording
Table Looks Messy
Try:
- Add spacing
- Align text properly
- Use fewer colors
Rows Uneven
Try:
- Resize manually
- Use consistent spacing
- Snap to guides
How to Make Canva Tables Look Better
Use these practical tips:
1. Keep It Simple
Clean tables usually perform better.
2. Use Hierarchy
Headers should stand out.
3. Align Content
Left, center, or right alignment should be intentional.
4. Use White Space
Give data room to breathe.
5. Test on Mobile
Small screens need readable tables too.
Expert Tip
After testing Canva tables for client proposals, agency pricing sheets, presentations, and menus, I have found that most weak tables fail because they try to do too much. Too many colors, too much text, and too many borders make data harder to read.
If you are unsure where to start, use:
- Clean font
- 2 brand colors max
- Clear headings
- Balanced spacing
- One strong CTA if selling something
That workflow works in many real projects.
Frequently Asked Questions
Go to Elements, search for table, add one, then edit rows, columns, and styling.
Yes. Table controls allow you to expand layouts depending on your version.
Yes. Canva is useful for pricing charts, package comparisons, and offers.
The tool may need updating, or the design may need resizing and better formatting.
Yes. Many table features are available in the Canva app.
Final Thoughts
Learning how to insert a table in Canva is an easy secret for better graphics. It gives your files a crisp look and stops your information from looking like a giant, confusing wall of text. It is a fantastic trick for product comparisons, timetables, or any creative work you are sharing online.
From real experience, you get the best results when you don’t overcomplicate things. Stick to a strong, simple grid, use clean spacing, and keep your colors light. Fancy styles always change, but keeping your facts clear and helpful never goes out of fashion.

I’m Faraz, the founder and lead content strategist at The Vistly. With a background in digital marketing, I lead content and design strategy for the site, working alongside a small team of designers to create practical Canva tutorials, font pairings, and design resources for creators, small businesses, and marketers around the world. My goal with The Vistly is to make professional-quality design accessible to anyone, no design degree required.